HOW TO CHANGE THIS CONTACT SHEET INTO AN ANIMATION
ALL IMAGES MUST BE THE SAME FORMAT AND SIZE ie: LANDSCAPE or PORTRAIT!
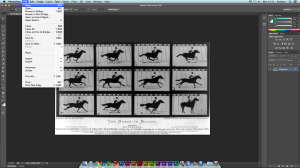
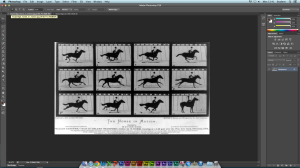
If your images are set out in a contact sheet as below, You need to do the following.
Add contact sheet into photoshop and select the marque tool in the left hand panel.
Once you have selected the marque you need to select the first and drag a box around the image as below.
Once you have done this you need to click into edit then copy.
Once you have created a copy you then need to create a new file as below.
A dilog box will then open up, give your animation a title and click OK.
you will know have a new blank file as below.
click edit / paste and this will give you a single frame.
You know should have a layer in bottom right corner as below.
go back to to your original file by clicking into top left corner.
Hover your mouse over the first frame and left click and drag the selection into the 2 frame.
You then need to repeat the process edit – copy click back into new file and then edit paste. This will have created another layer as below.
Repeat this process for all the frames from your contact sheet.
Once you have done this you should have (in this case) 12 layers as below.
you then need to drag the background layer into the waste bin.
once you have done this its a good idea to save the animation as a PSD File.
you then need to click into window and click and timeline.
You then need to select all the layers (12 in this case) by clicking in select and All layers.
then click create frame animation at the bottom of the page.
On the bottom of the page there is a tiny icon button, click into that and choose Make Frames From Layers.
All your layers should then be at the bottom of your page as below.
Then select all the images.
You then click into the secs drop down and change to 0.1 sec.
This will change all the frames to 0.1sec as below.
Change the icon box that says once to forever.
YOU CAN THE PLAY YOUR ANIMATION 🙂
YOU NEED TO SAVE YOUR FILE AS FOLLOWS:
File / Save To Web
A BOX WILL OPEN AND SAVE AS THE FOLLOWING SETTINGS.
AND VOILA!


